"A hero is someone who voluntarily walks into the unknown"
- Tom Hanks.
Why did we start a post about the Jupyter dashboard with a Tom Hanks quote?
Well, we want you to be a Python hero (which you will be). And if you are a complete beginner, you have to open Jupyter and "walk into the unknown". See? The Tom Hanks reference does make sense now.
Our goals in this tutorial would be to show you how to start with Jupyter and how to navigate through the Jupyter dashboard.
Introduction to the Jupyter Dashboard
Ok, put on your safari hats, we are about to go on a quick tour of the Jupyter dashboard. (For a more detailed guide, check out our Introduction to Jupyter course.)
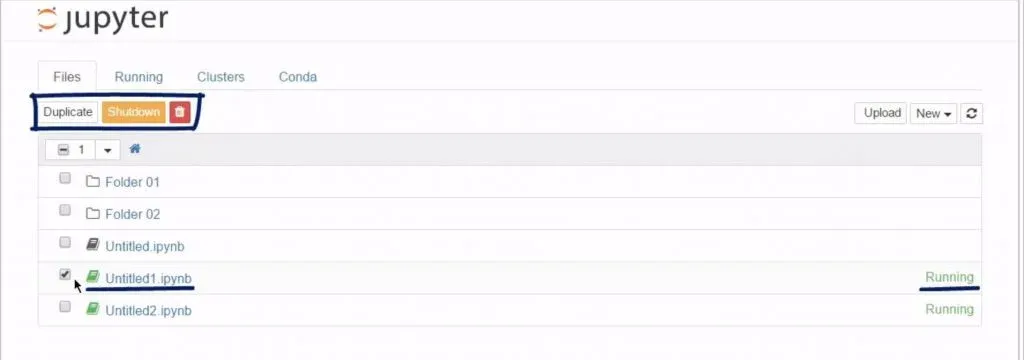
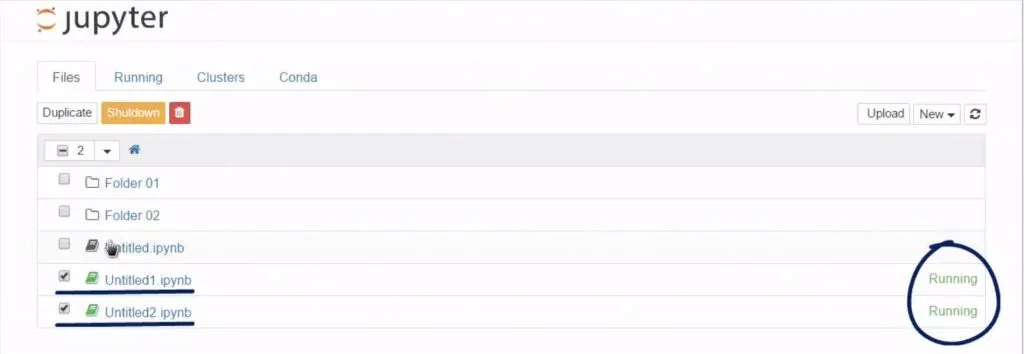
As soon as you load a notebook, the Jupyter dashboard opens. Each file and directory has a checkbox next to it. By ticking and unticking an item, you could manipulate the respective object – that means you can duplicate or shut down a running file. In addition, you can rename and delete folders.
The selection menu allows you to select all the files in the console of the same type.
For example, you could mark all the folders or all the running files.
Directories Management in the Jupyter Dashboard
The logic behind directories management is the same as the one of an operating system – files can be grouped into folders, and folders can contain other folders.
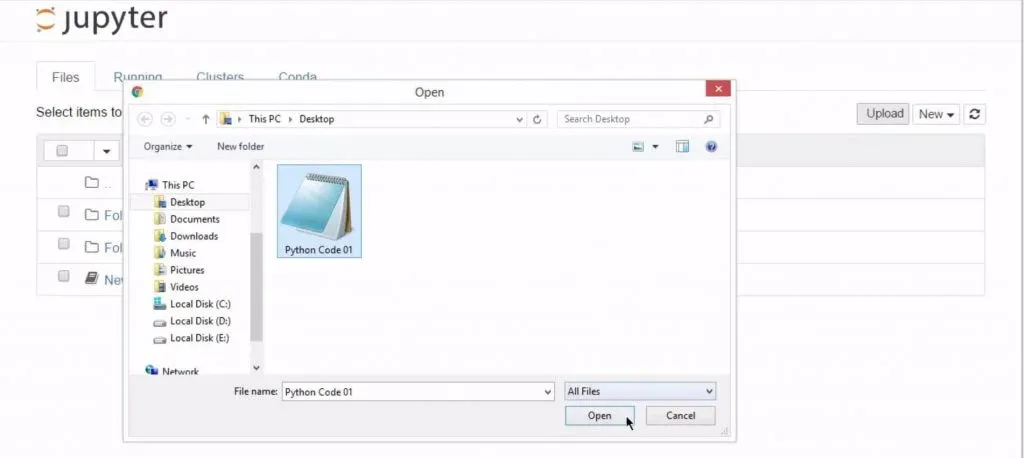
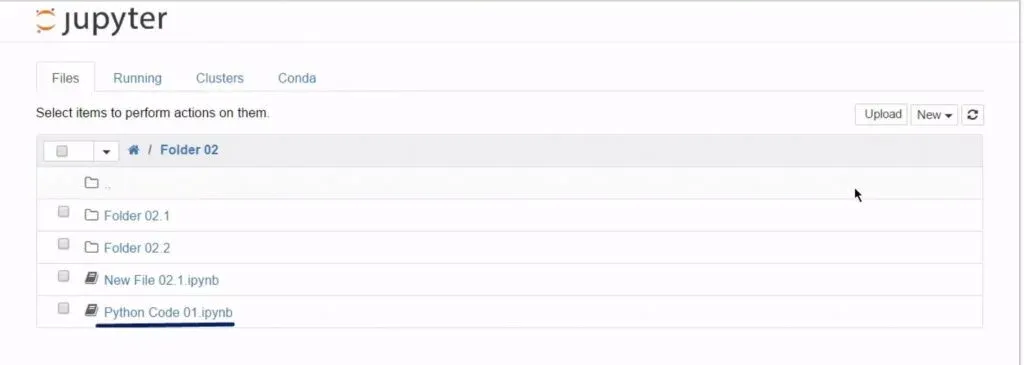
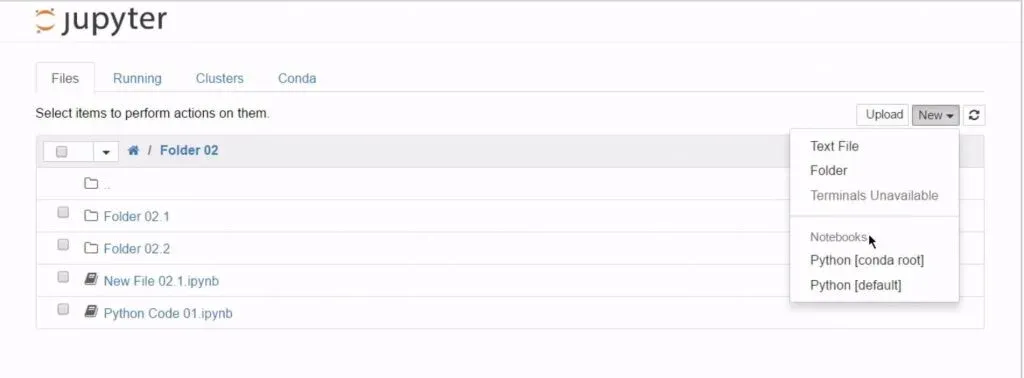
From the “Upload” button in the top-right corner, you can upload a notebook into the directory you are in. The standard explorer box opens and when you select a file, you can click on “Open”, and it will immediately appear in your directory.
Finally, you can expand the “New” button. From the list that falls, you will most likely need to create a new text file, a new folder, or a new notebook file. A notebook file can contain code in any of the languages in your “Notebooks” section.
When you create a new Python notebook file, it will be recorded in the IPython Notebook format, .ipynb for short.
Don’t be afraid of the IPython designation – think of it as the predecessor of Jupyter. Consider the IPython Notebook format as a legacy file format… All right, let’s carry out a few operations. I will rename the folder "Folder 02.1"to “Exercises”.
Here's how we do it.
Next, I will create a new IPython Notebook file by expanding the “New” button and selecting one of the two Python formats shown below.
Let’s use the default Python format. The browser immediately opens a new tab for me. This is the interactive shell we mentioned earlier. Here, you will write your code and see its output.
Prerequisites for Coding Using the Jupyter Dashboard
Ok. Great. Now that we know more about the Jupyter dashboard, we are ready to examine the shell and see how we can write Python code in Jupyter. The field you see below is called a cell.
You can access a cell by pressing “Enter”. Once you’ve done that, you’ll be able to see the cursor, so you can start typing code.
The grey box is called input field.
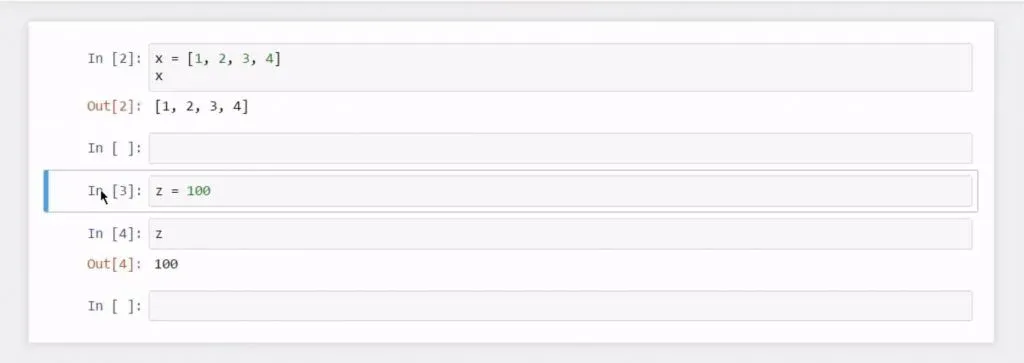
Let's add a simple line of code that says 'x is a list composed of four numbers, 1, 2, 3, and 4'. After that, I can ask the computer to print this list for me by typing “x”.
A command can be executed in two ways:
1) Hold Ctrl and then press Enter. By doing this, the machine will execute the code in the cell, and I will “stay” there, meaning I will not have created or selected another cell.
Observe that an output field with the same number as the input field appeared. Input and Output fields of the same number are grouped together. The output represents the machine’s response to your commands provided in the corresponding input and the respective field cannot be modified.
2) To execute the same code, hold “Shift” and then press “Enter”. The previous two commands are being executed and then a new cell where you can write code is created. If you use “Shift” and “Enter”, you can continue typing code easily. This option allows for a more fluid code writing experience.
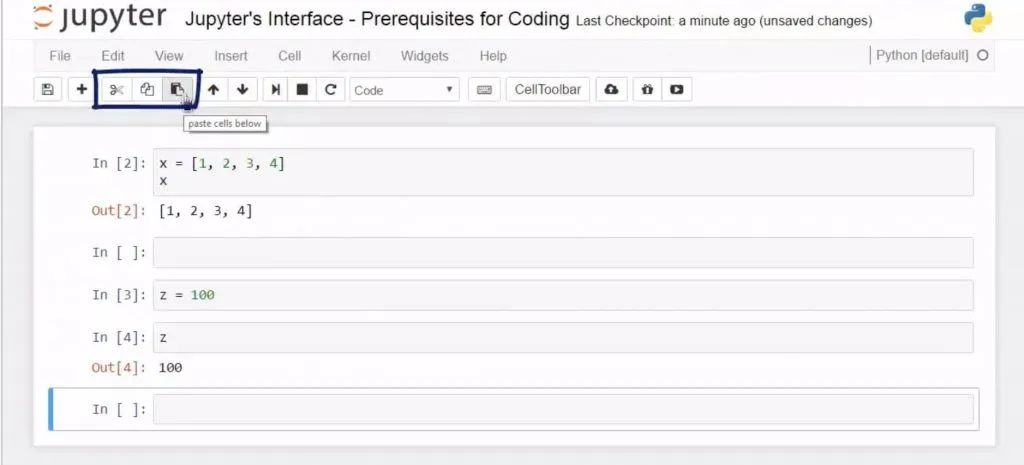
It is amusing that you can cut, copy, and paste cells. To do that you will have to use the buttons on the main menu.
Shortcut Keys in the Jupyter Dashboard
Since we are keen supporters of ergonomics, we suggest you get used to the keyboard shortcuts. When coding, you will mainly have to use the keyboard, so it’s worth memorizing different keyboard combinations that would allow you to work faster.
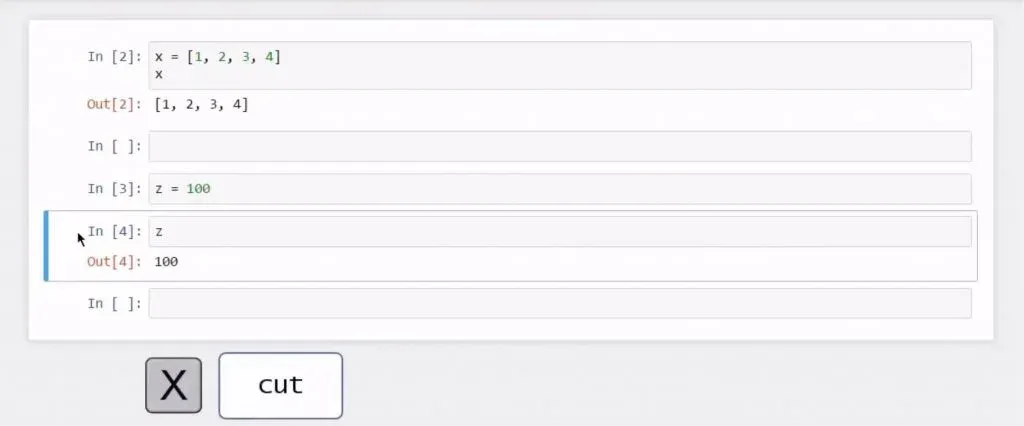
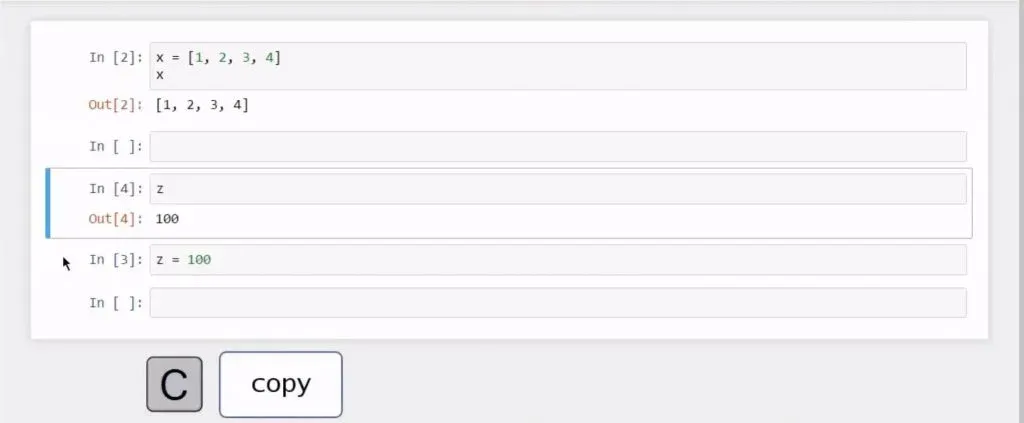
Let’s see how we can apply shortcuts in practice. I will cut the cell below by selecting it, and then pressing the “X” key.
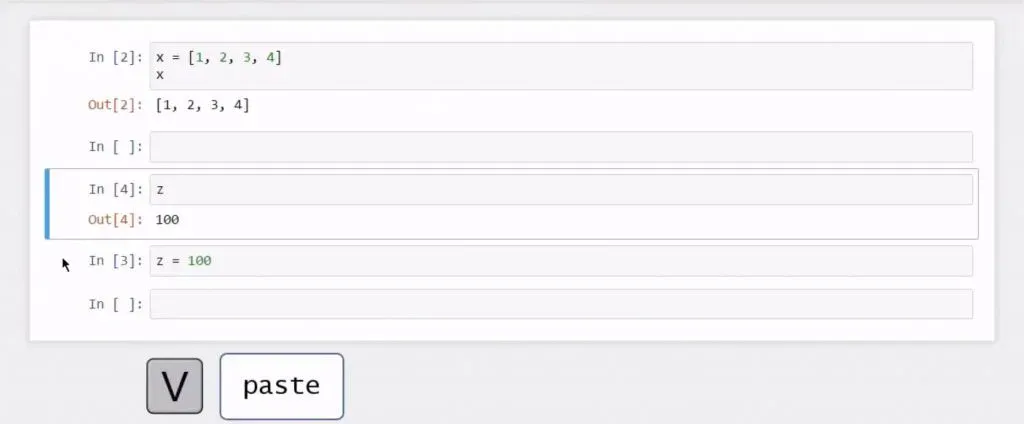
Remember you can always use the arrow keys to navigate along your notebook file. So, I will move up and then directly press the “V” key to paste it.
Voilà!
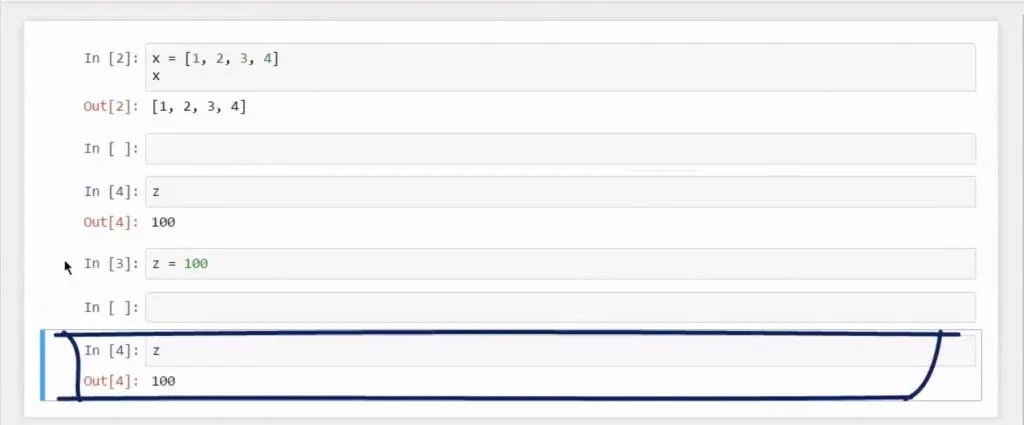
My cell was moved up, below the cell I had selected before I pressed the “V” key. Now, I will press “C” to copy the same cell.
I will use the arrow keys again to go down this time, and at the end, I will press “V” again. Apparently, this cell was copied and pasted below.
The other two buttons in the menu cannot be substituted by keyboard shortcut combinations. They allow you to move a selected cell up or down. The corresponding output field moves along with its input cell.
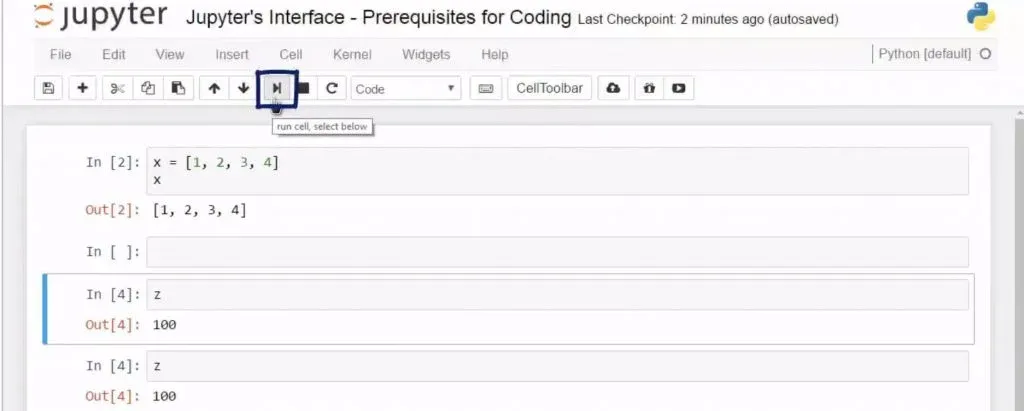
Instead of carrying out a command with Shift and Enter, you might prefer clicking on the button below with the mouse – the result will be the same.
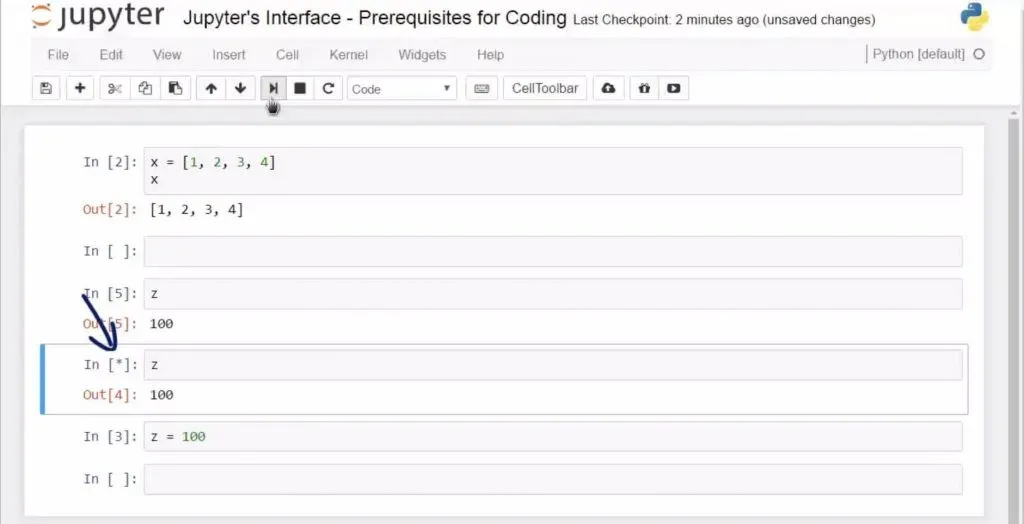
What is interesting is that, when you work with more complex code that requires tougher calculations from the computer, while running the code, a little star will appear, before the square brackets.
Sometimes, this process might take too long to complete, so to stop it or break it, the classical “stop” symbol can do that for you.
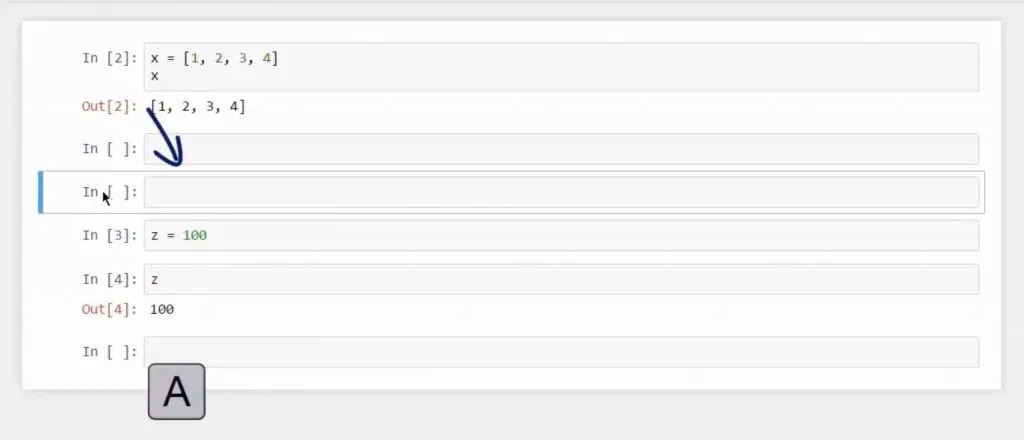
Three other shortcuts could accelerate your coding a lot. Suppose I have selected a cell. After I press the “A” key, a new empty cell will be inserted above.
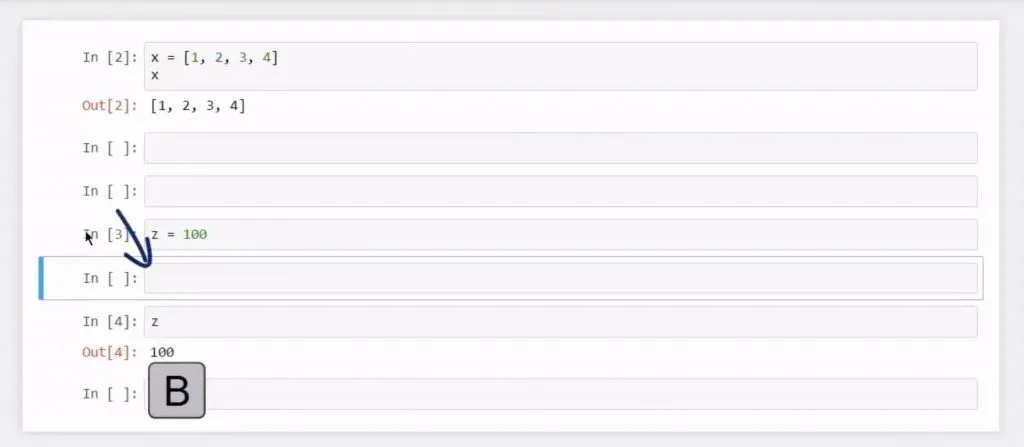
If I select the same cell and press “B”, another cell will be created just below.
Imagine the last step was a mistake and I need to delete that empty cell. In this case, it has already been selected, so I can press the “D” key twice, and it will readily disappear.
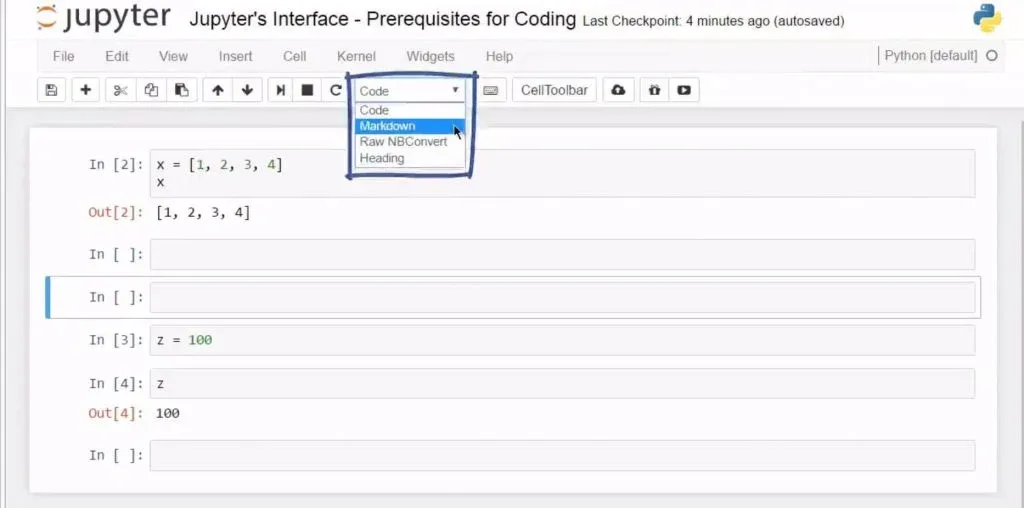
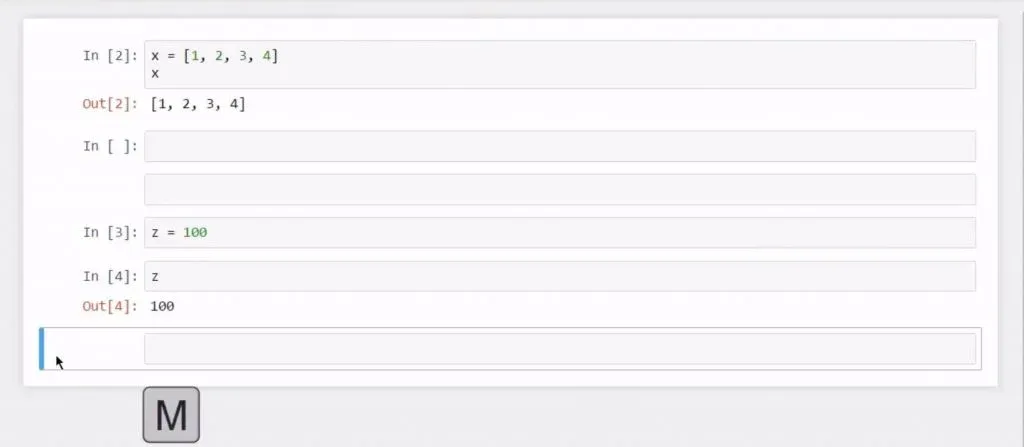
All the cells we saw so far were code cells. Let’s see what is a markdown cell. It is a cell that contains strictly documentation - text not executed as code. It will contain some message you would like to leave to the reader of the file.
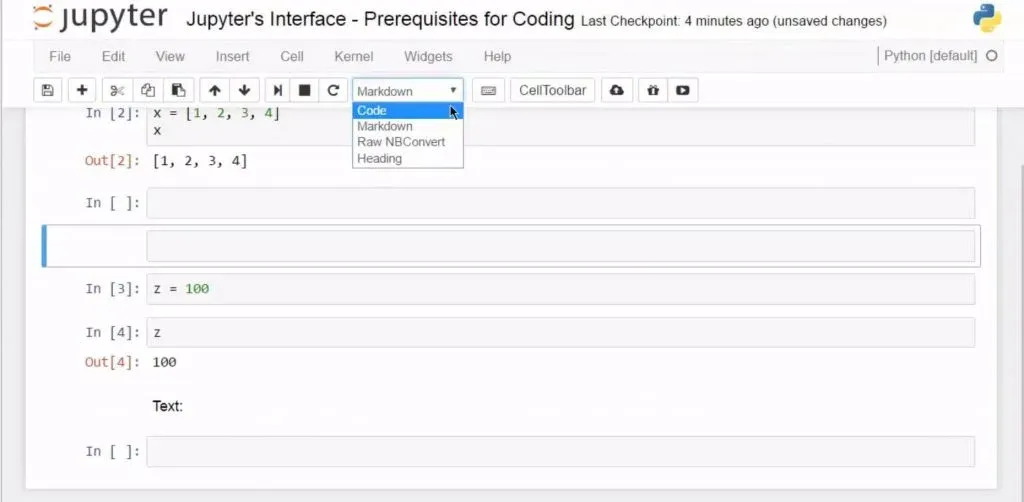
To convert a selected cell into a markdown cell, you should either expand this list and opt for “markdown”, or simply press the “M” button. Press “Enter” to access the cell and type some text.
When I run this cell, the output will be a simple statement.
Now, if you want to turn a markdown cell back to a code cell, select it and opt for “Code” from this drop-down menu or press the “Y” key.
The Jupyter Dashboard Overview: Why Use Jupyter?
To conclude, there are two advantages of using Jupyter. First, when your code becomes longer, mark low you to leave comments and explain the solution you’ve created. This is why practitioners love to use them.
The other benefit of using this App is you can select and execute whichever cell you want to – you need not run all the previous cells to run a particular cell! This allows for solving a problem in pieces and saves a lot of computation time. (However, if you want to get familiar with other Python IDEs, you can find out more in our extensive Python Programming Guide.)
Ready to Improve Your Python Skills?
Now, that you have installed Anaconda on your computer, and Jupyter feels a bit more familiar, it is time to pull up your sleeves and learn how to code in Python. Our Introduction to Python course is the perfect way to do that. Try it for free!

