
The Jupyter Notebook is one of the most popular code editors used by data scientists today. Its application makes creating and sharing notebooks simple, as well as performing end-to-end data science workflows in a single document.
By using a Jupyter Notebook, you can:
- Write code
- Create interactive data visualizations
- Add explanatory text
- Run equations easily
If you are a beginner to programming and data science, a Jupyter Notebook is one of the best places to start. The platform has been specifically designed for data science tasks and supports over 40 programming languages, including Python. It removes a lot of the complexity that comes with traditional code editors and provides a relatively simple interface for non-technical individuals to set up and write code.
In this Jupyter Notebook tutorial, we will provide you with a step-by-step guide so you can brush up on your data science skills. Don’t worry if you’re just getting started! We will take you through the entire process: from installing the software to running your first line of code.
If you’re wondering why this specific programming environment, read our article about the advantages of using Jupyter to code in Python.
Step 1: Install Jupyter Notebook
To get started with Jupyter, you first need to install the Anaconda distribution – the world’s most popular data science platform, which comes with a list of 250 packages automatically loaded.
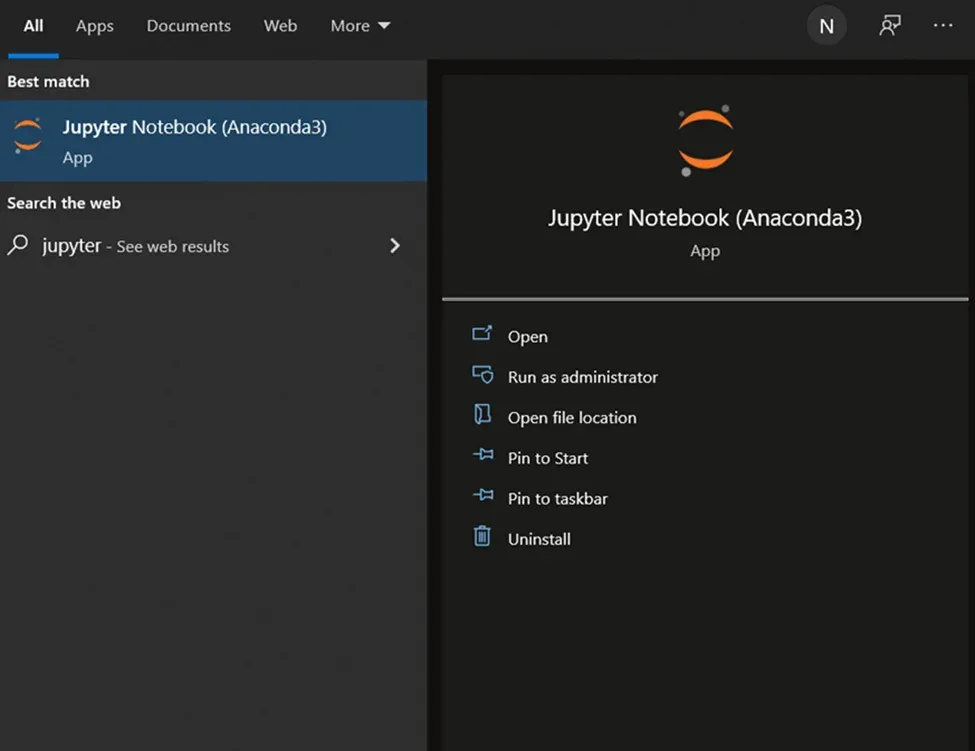
Once the process is complete, a Jupyter Notebook shortcut will appear on your Start menu:
Step 2: Create a Jupyter Notebook File
After clicking on the Jupyter Notebook shortcut, you should see a screen that looks like this appear on your web browser:

This is what the Jupyter dashboard looks like. As you can see, the Files tab displays all the folders and sub-folders that you have on your device. Here, you can easily navigate to different directories in order to access data or files.
Let’s start by creating our very first Python notebook in Jupyter.
In the Files tab, click on New, and select the Python 3 option:

This will open a Jupyter Notebook in a new tab. You will notice that the notebook is titled “Untitled.ipynb.” The ‘.ipynb’ extension stands for iPython Notebook – otherwise said, the standard format for all Python files you open in Jupyter.
Note: You can easily convert an ‘.ipynb’ file into different file formats; we will show you how to do this later in the tutorial.
Step 3: Explore the Jupyter Notebook Interface
Let’s play around with our Python notebook to get familiar with the interface. To rename it, just click on the Untitled section, type your new title in, and click OK. Now, let’s do some coding.
How to Run Code in Jupyter Notebook
Unlike traditional programming IDEs, a Jupyter Notebook consists of code cells that allow you to write and run Python code:

To execute a code cell, you can either click on the Run button below the Menu bar or hold Shift + Enter on your keyboard. To create a new code cell, you can either click on Insert > Insert Cell Below, or use the keyboard shortcut Alt + Enter.
A Jupyter Notebook will print the output of your code regardless of whether you use a print function. However, this only works for the last line of code in each cell, since Jupyter notebooks execute commands from top to bottom.
Let’s try out an example to understand this better. First, run the following line of code in a new cell:
print(1+2)As expected, the output of this cell is 3.
Now, let’s try this in a new cell without the print statement:
1+2Again, we will get 3 as the output, although we didn’t use the print function.
Finally, let’s run these 2 lines of code in the same cell:
1+2
2+2
Notice that we get a single output this time: 4.
When we run a cell without using the print statement, Jupyter will display the output only for the last line of code in the cell. If we want to see multiple outputs in a single cell, we need to use the print statement.
Jupyter Notebook Functions
Now, let’s take a look at some other important functions you can perform using a Jupyter Notebook.
The File option allows you to save your notebook, make a copy of it, rename it, and create a new ‘.ipynb’ file. Jupyter also has an autosave feature, and your notebook will automatically save every 2 minutes without you having to manually create checkpoints.
Insert allows you to insert new cells above and below the current cell you are on. Clicking on Cell provides you with multiple options to run, select, and insert cells in the notebook. You can choose to run all cells in the notebook at once, or only run selected ones at a time.
Another important feature of a Jupyter Notebook is the kernel which executes code contained in the document. It launches the moment you open your notebook.
If you want to stop running a cell, you can simply select Kernel > Interrupt. Sometimes, if a code cell takes too long to execute, or the kernel is stuck in an infinite loop, you can restart it to remove all existing variables and run the notebook again.
Finally, clicking on the Help option provides you with help on many popular Python libraries. There are also more Jupyter keyboard shortcuts available for you to perform tasks other than the ones mentioned above; you can find them by navigating to Help > Keyboard Shortcuts.
Step 5: Jupyter Notebook Markdown
Markdown is a markup language that allows you to format plain text easily. If you ever need to present a Jupyter Notebook or explain your findings to another person, you can easily structure this using this functionality.
To get a feel of how Markdown works in Jupyter, click on Shift + Enter in your notebook to create a new cell. Then, click on the drop-down option underneath the Menu bar. Notice that the default option is Code:
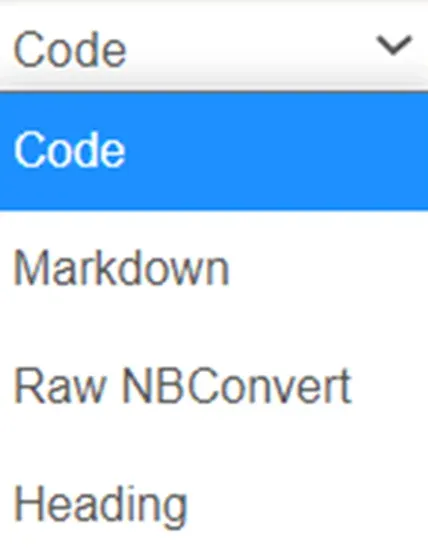
For the purposes of this tutorial, we’ll select the Markdown option.
Now, copy and paste the following lines of text into a new Markdown cell in your notebook and press Run:
# I am a level 1 heading.
## I am a level 2 heading.
## I am a level 3 subheading.<b>I am bold.</b>1. I am a numbered list.
2. You can also call me an ordered list.<i>I am italic.</i>- I am a bulleted list.
- You can also call me an unordered list.
Your output should look like this:

Essentially, Markdown allows you to include HTML tags into plain text to format it the way you like. This is an extremely useful function as data scientists don’t need to extract their code output and showcase findings in an external document; everything can be done within a Jupyter Notebook, along with styled headers and code explanations.
For even more useful tips and tricks, read Jupyter’s complete documentation on Markdown cells. You can use it as a reference to format text in your Python notebooks in any way you please.
Step 6: Install Jupyter Notebook Packages
As mentioned above, the Anaconda distribution comes with a wide array of pre-installed packages. However, if you require any other libraries for your data science workflow, then you will have to add them manually.
To do this, click on the New option on the Jupyter homepage, then select Terminal:
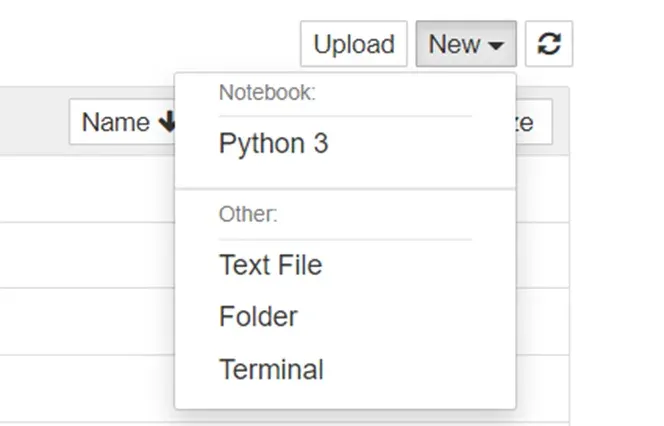
As the name suggests, a terminal will appear in a new tab. To add another Python package, simply type conda install packagename and wait for the installation to complete.
For example, if you wanted to install the pandas library, you’d type the following command into your terminal:
conda install pandasStep 7: Export a Jupyter Notebook
Once you are done running code and creating beautifully styled text in your Jupyter Notebook, you have the option to export it. Click on File > Download as to see the many different file formats available:
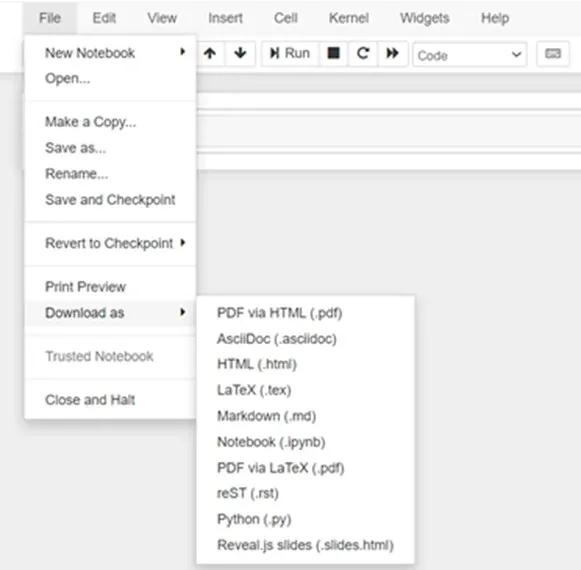
You can choose to save it as the default ‘.ipynb’ file format. Additionally, you also have the options of saving it as a ‘.pdf’, an ‘.html’ document, or a ‘.py’ file (an extension that can be opened by any Python non-GUI-based code editor).
Step 8: Close the Jupyter Notebook File
Once you are done, make sure to shut down your Jupyter Notebook interface by clicking on File > Close and Halt.
After all your notebooks are shut down and no kernels are running, navigate to the file manager and click on the Quit option:

And that is it! You’ve now successfully created your own Python notebook in Jupyter, executed code commands, exported your files, and shut down the program correctly. If you need more guidance on how to use the software, check out our Introduction to Jupyter course.
Jupyter Notebook Tutorial: Next Steps
Now that you've practiced working on a notebook, it is a good idea to start learning how to code in Python. This will not only look fantastic on your resume, but also increases your chances of getting that data science interview where you can truly impress your future employers. Our Introduction to Python course is a great starting point!
And when you’re ready to take your data science career path to the next level, the 365 Data Science Program is here to guide you there. It offers self-paced courses led by renowned industry experts. Starting from the very basics all the way to advanced specialization, you will learn by doing with a myriad of practical exercises and real-world business cases. If you want to see how the training works, start with a selection of free lessons by signing up below.


