When coding, getting accustomed to using Python variables is essential.
“Give me a lever and a place to stand and I will move the earth.”
– Archimedes
This saying proves that when given the right tools, you can achieve anything! In our case, learning how to use Python variables, we will take our first steps to becoming coding masters!
In this tutorial, we will code in Jupyter. If you're unsure how to work with it, take our Introduction to Jupyter course.
Getting started with Python Variables
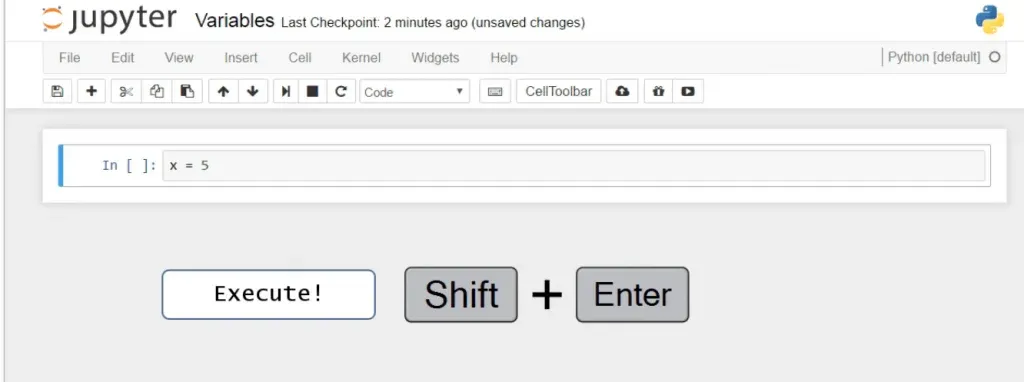
One of the main concepts in programming is variables. They are your best friends. You will deal with them all the time. You will use them to store information. They will represent your data input. Let’s say you want to have a variable 'x' that is equal to the value of 5 and then ask the computer to tell you the value of that variable. So, we must tell the machine that x equals 5. And this is how you can do this in Python. 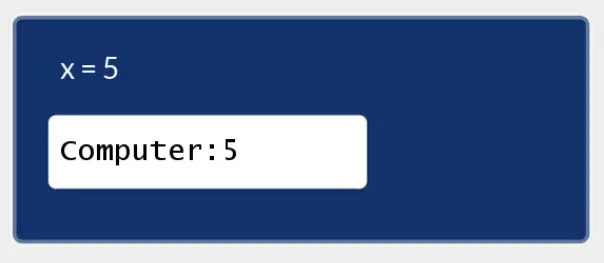
You’ll need to type x equals 5.
To go through the process of programming, the line that says x equals 5 is called a command or a program. This is just a line of text.
Executing Code
To make something out of it, we must execute it. Only then will the computer carry out operations with it. The way to execute code in Jupyter is by pressing Shift and Enter (not just Enter), and a variable called x will be created and assigned with a value of 5.
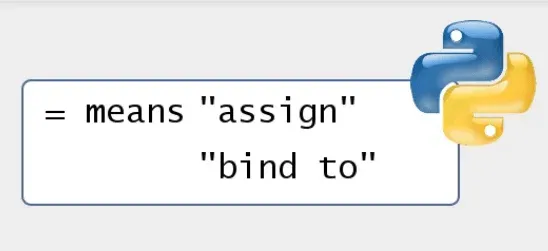
To be more precise, “equality” in Python and in programming means “assign to” or “bind to”.
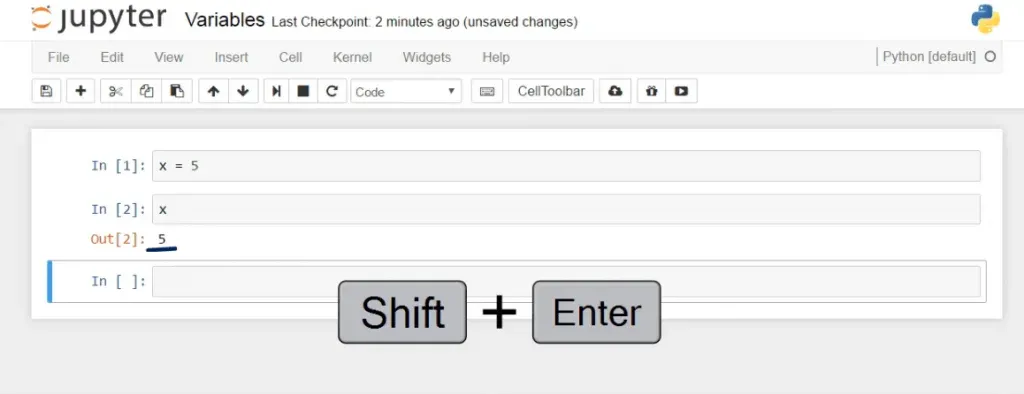
How can we ask the computer to show us the output of what we just did? In Python, it would be sufficient to write x and then press Shift and Enter. And here’s the result: 5.
As you can see in the picture above, typing in a single line of code entails a few concepts of programming simultaneously.
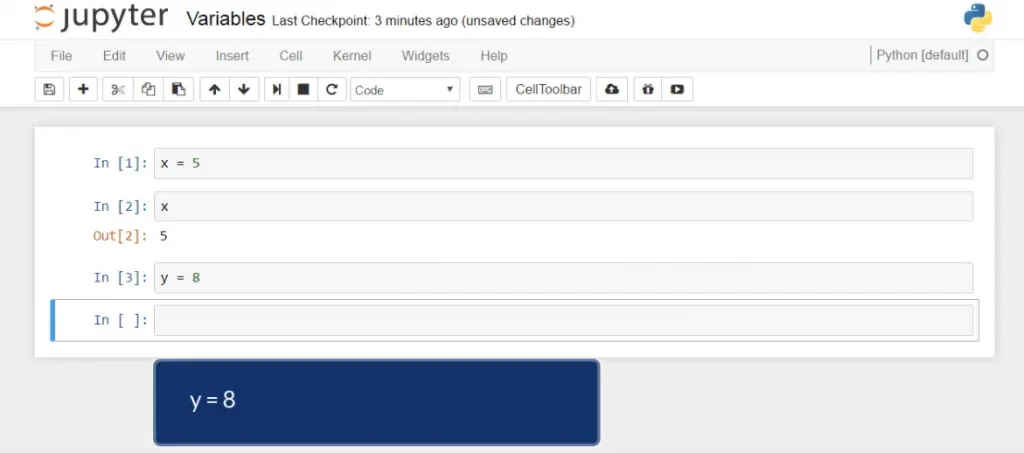
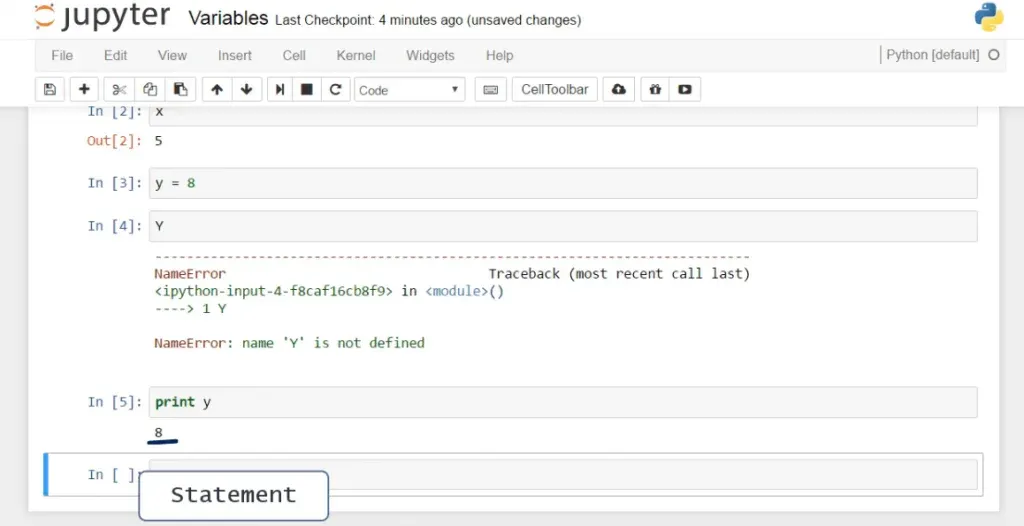
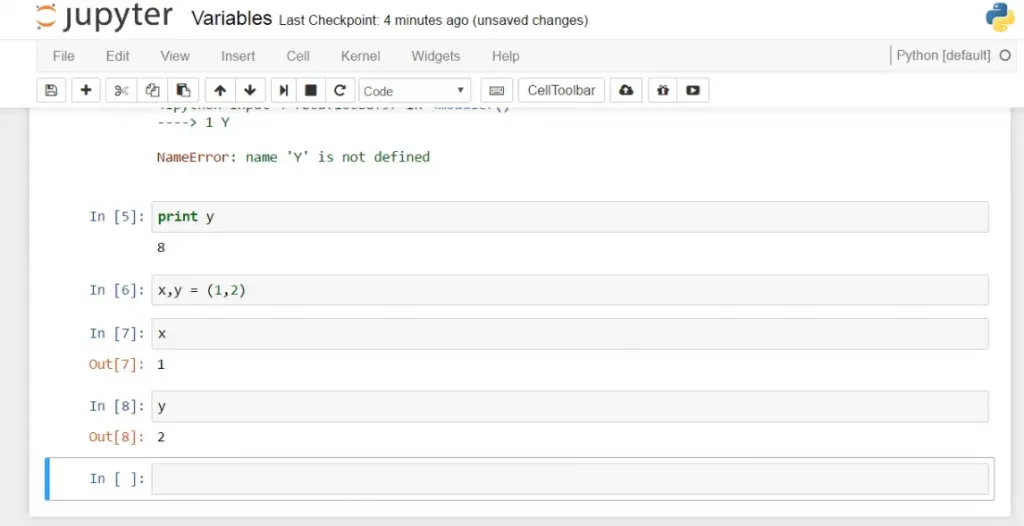
Now, let’s assign the value 8 to a variable we call y. Then, press Shift plus Enter, and our job is done.
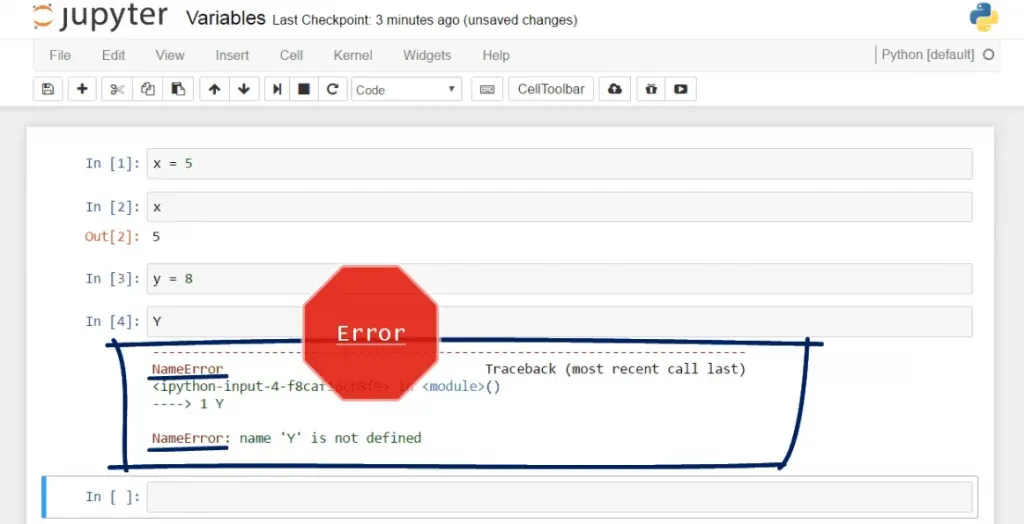
Let’s see what happens when we type capital Y and then execute by pressing Shift and Enter.
Oh! An error! This shows us that Python is case sensitive, so pay attention to that. It matters whether you use lowercase or uppercase letters.
The Print Command
An alternative way to execute the instruction that will provide the value we assigned to y would be to use the print command. At first sight, it seems redundant as we showed we can just type “y”. Nevertheless, this command is applied often; you’ll see it in most of the code produced by professionals. It complements the logical flow of your instructions. For instance, if we say “print y”, the machine will simply execute this command and provide the value of y as a statement, and this is all a programmer must see sometimes.
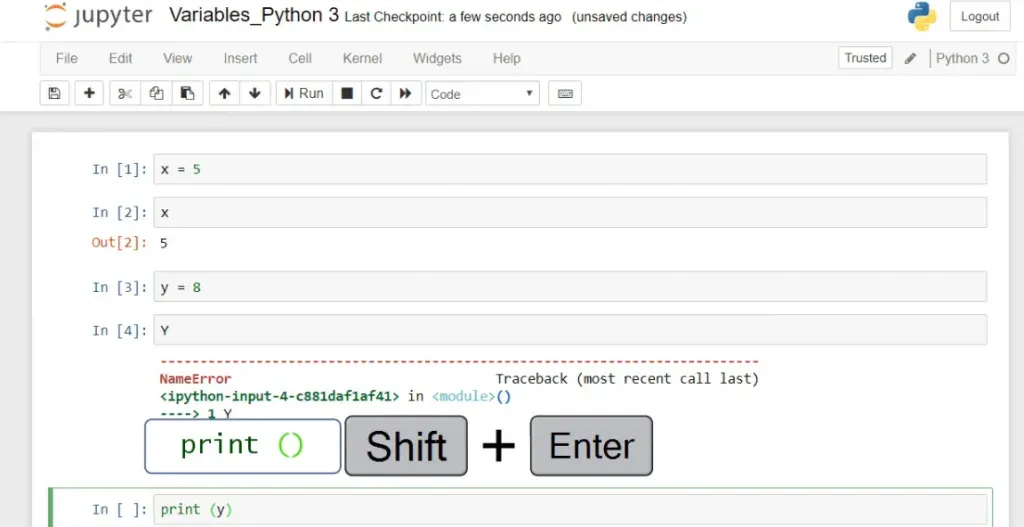
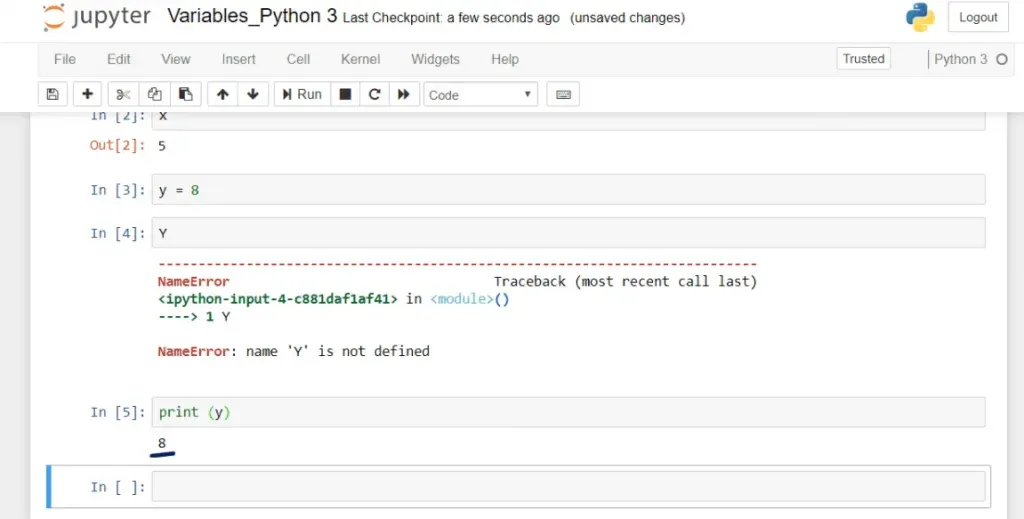
“print” exists in Python 3 as well. Its functionality is practically identical to the one just described for Python 2 with the sole difference that here you must place the name of the variable within parentheses, in this case, y. Then, you can press “Shift and Enter” to execute the code in the cell and see that you’ll obtain an identical output: the number 8.
The difference stems from the fact that Python 3 treats “print” as a function, while Python 2 – rather as a command. Therefore, from now on, if you are using Python 3, and you see “print” followed by a name of a variable, please just add parentheses around the variable name and you’ll be good to go.
But we will not dig deeper into explaining this, as there’s a whole section devoted to Python functions; there everything about functions will become much clearer.
Great! We hope you found this comparison useful. Now let’s continue by talking about Python variables.
Python Variables
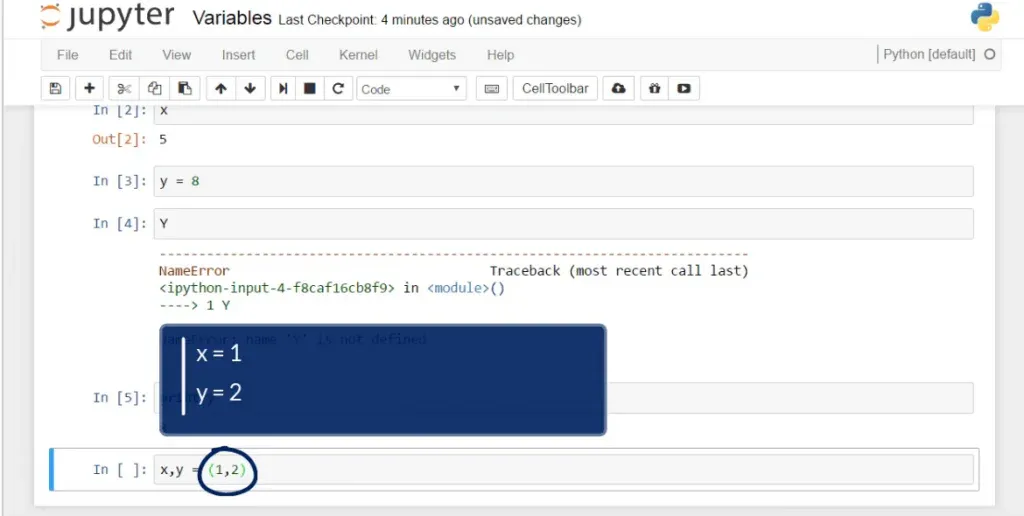
The last thing I’d like to share with you in this tutorial is that you can assign a certain number of values to the same number of variables. To create the variables x and y, we have to assign two values – say, 1 and 2. We must separate each of the variables and each of the values with a comma.
The parentheses here are not obligatory, but we use them to improve the readability of our code.
Now, if I type x or y separately, the computer will correctly give me their respective values.
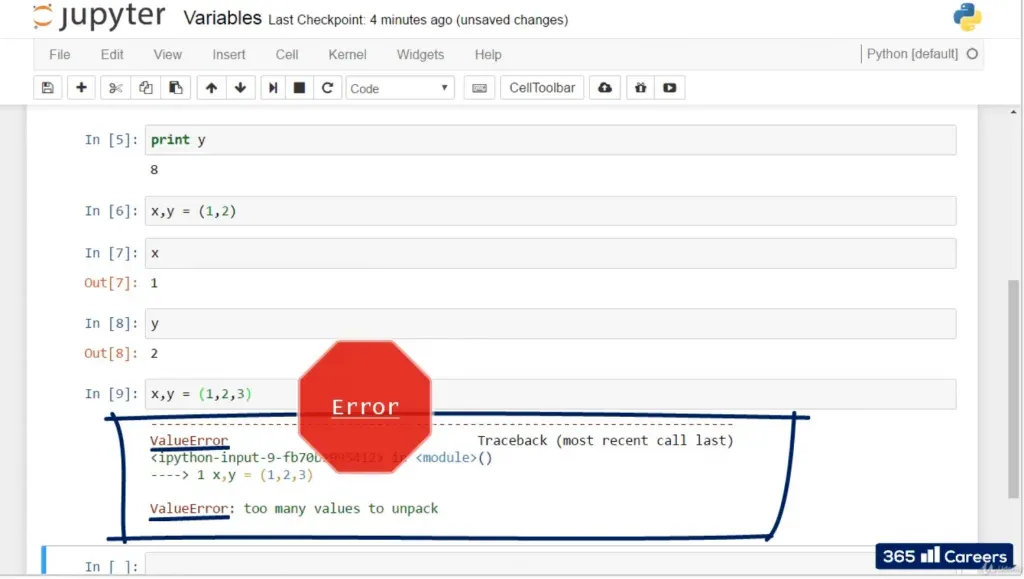
It is very important that the number of variables on that line equals the number of values; otherwise, you will get an error message. Take a look at the picture below.
Great! This is a great start to your journey in Python! Make sure you go through the exercises attached to this tutorial!
Please remember that in all the exercises, there is source code for both Python 2 and Python 3 users. If you are not familiar with the difference between Python 2 and Python 3, this article may well shed some light on that subject.
Using Python Variables
In summary, assigning values to variables and working with them is not rocket science. Now that you have become a dab hand at using Python variables, you can expand your knowledge by finding out which are the data types in Python.
***
If you’re enthusiastic about boosting your Python knowledge, check out our Introduction to Python course.
Or, if you're interested in the Python job outlook, learn more about your career options in our Ultimate Python Programming Guide!


