Python and its sidekick R are the two most popular programming languages in the realm of data science. To experience this first hand, you will need to install Python and Jupyer on your computer first. In this tutorial, we will show you how to do that. Once you have learned how to install Python and Jupyter (through the Anaconda package), you will be able to go ahead and start coding, which of course, is something we will show you how to do in our next tutorials.
So, let's get right into the topic:
How to Install Python and Jupyter in Anaconda?
There are different ways to install Python and Jupyter on your computer. But especially for new users, it is highly recommended to opt for Anaconda. It will install, not only Python but also the Jupyter Notebook App and many scientific computing and data science packages.
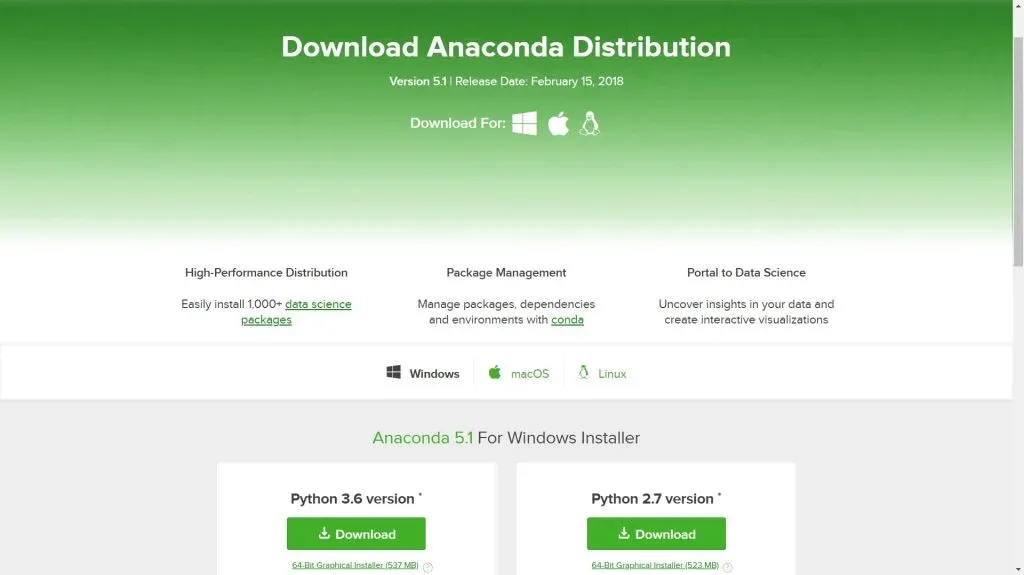
Let’s open www.anaconda.com. You have to pick one of the three operating systems listed here – Windows, Mac, or Linux. Here, we will show you how to install Python (Anaconda) on Windows, but the procedure is identical if you are going to use the Mac or Linux version.
Also, you must choose the best of the four provided options.
Do you need a 2.7 or a 3.5 version? And then there is a 32-bit or a 64-bit version, depending on the Windows you have installed.
I know it sounds strange to maintain not one but two versions of a single program. Please bear in mind that the differences between Python 2.7 and 3.5 are almost insignificant. We will describe the differences between the two versions in a dedicated post.
When you choose between a 32 or 64-bit version, you can simply check your operating system.
Newer computers are surely running with a 64-bit processor, but if you would like to verify this before you begin, you could open your control panel menu from the start window.
Then, select the “System” icon and check the information referring to the “System Type”.
In my case, it is 64-bit, so when I go back to the Anaconda website, I will select the 64-bit 2.7 Python version.
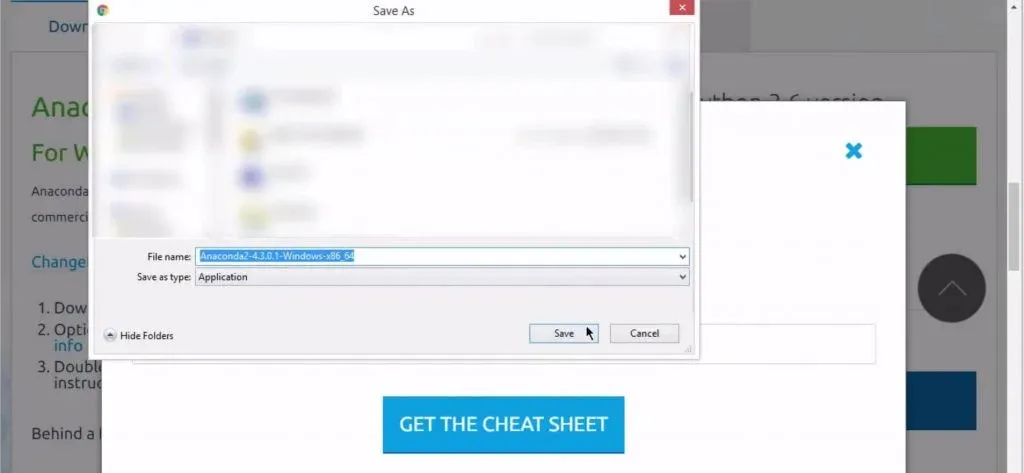
Then, we must find a directory where we want to install Anaconda and press “Save”.
While waiting to complete the download, you can decide whether to leave your e-mail to Anaconda. This is not a necessary step, so you could also select “No Thanks” and you are good to go.
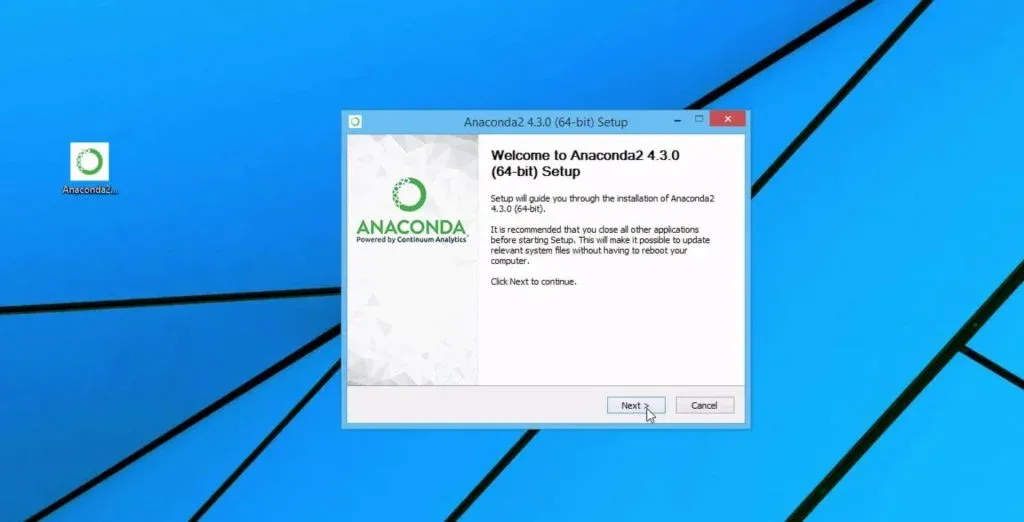
When the download has finished, please double-click on the file to run the application.
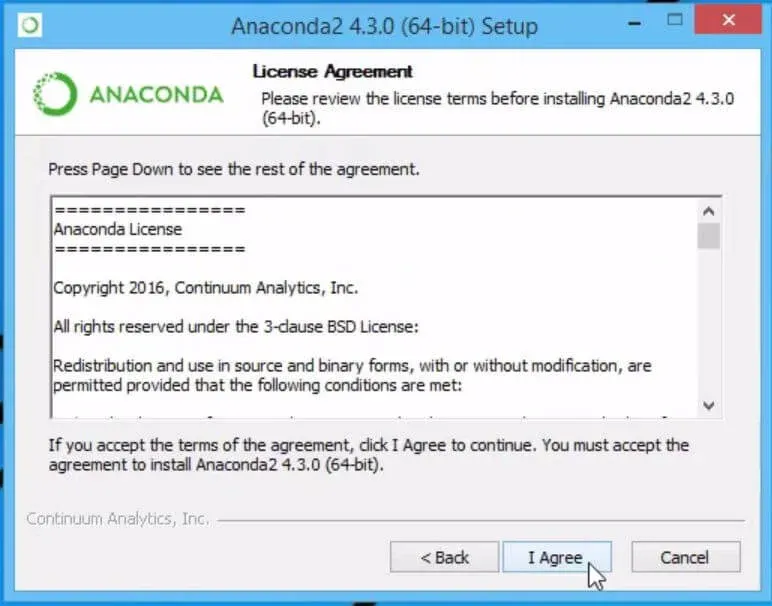
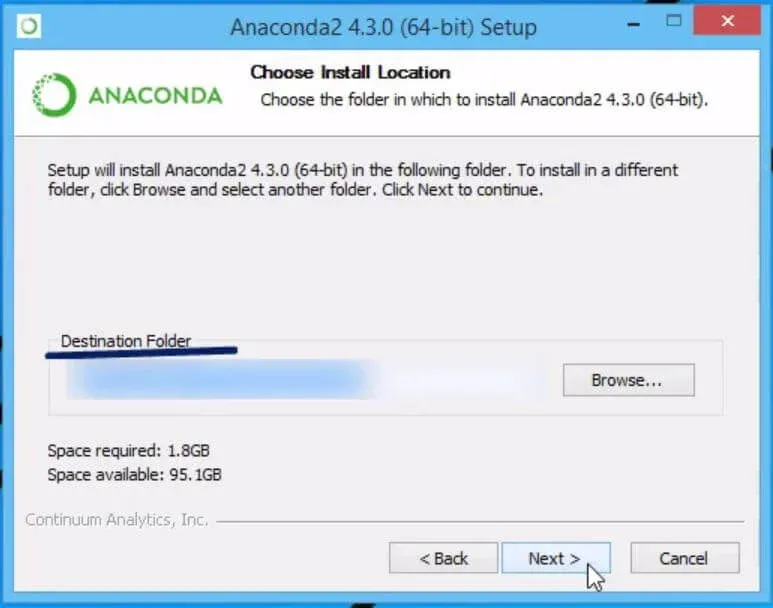
What follows is nothing different from the standard windows installer. Agree and press “Next” until you have the chance to specify a destination folder.
You could do this after selecting the “Browse” button. When satisfied with the indicated directory, click “Next” one more time.
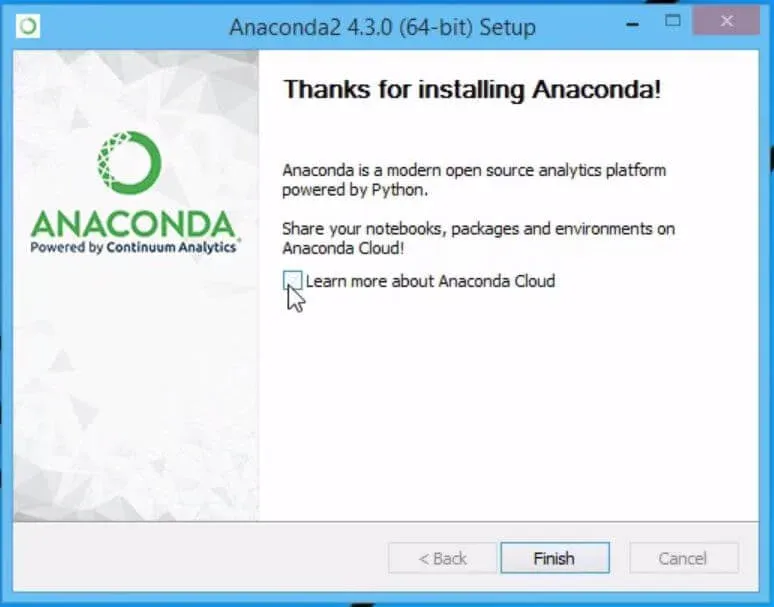
Finally, click “Install” and proceed until you see the window where you can finalize the installation. We will not use “Anaconda Cloud” just yet, so I’ll untick the box.
Author's note: If you are interested in becoming a data scientist, then go ahead and download our free data science career guide.
Next Step: Understanding the Jupyter Notebook Dashboard
Now you have the Python language, a text editor, many applications, and packages. You also have the Jupyter Notebook App. You can open the start menu and select Jupyter Notebook's icon from there.
A new window will pop up. It will take a few seconds for the App to load. Once this is done, your web browser will open a new tab with the Jupyter Dashboard.
And this is how to install Python and Jupyter on your computer. In our next post, we will go through Jupyter's interface describing its dashboard. This is the right way to continue your introduction to Python. (Unless you haven't read the super-informative 365 Python Programming Guide yet. It's a must-read for anyone getting started with Python, so don't miss out on gaining some invaluable Python knowledge.)
***
Take our Introduction to Jupyter course for a more in-depth guide. And if you’re enthusiastic about boosting your Python knowledge, check out our Introduction to Python course.

