Before reading this post you may want to get familiar with our post about SQL INSERT Statement.
TCL's COMMIT and ROLLBACK
ROLLBACK is a command that can bring the state of the data a step back, but not more than that. It will refer to the state corresponding to the last time you executed COMMIT. This means if you have already used COMMIT 10 times, ROLLBACK will have an effect on the last execution you have performed. After that moment, even if you run the ROLLBACK clause 20 times, you can get to the state of only the last COMMIT. You cannot restore data to a state corresponding to an earlier COMMIT.
In a nutshell, these are the SQL rules regarding transaction control. We must be very careful when using COMMIT and ROLLBACK – in other words, when we are changing the state of our data set.
Please note that it will be very hard to practice these statements unless we switch off the following feature of Workbench.
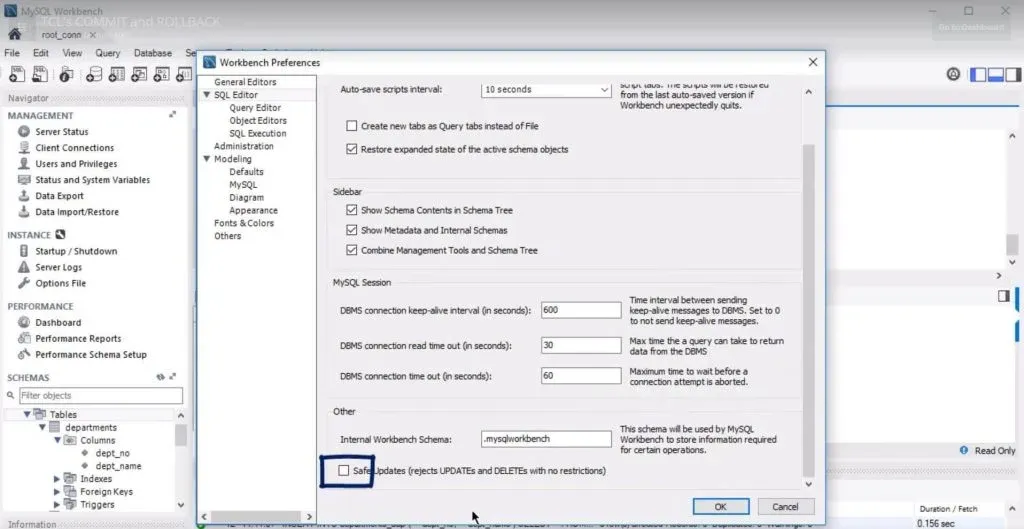
We can expand the Edit tab from the Main Menu and opt for “Preferences”. On the left-hand side of the window that pops up, choose the “SQL Editor” section. On the right-hand side, scroll down to get to the box that says, “Safe Updates”.
Through the ticking of this option, the software could prevent you from losing significant amounts of data or some of the changes you made earlier. However, it could also eliminate the possibility of controlling the state of the data in our database. None of these two features will help us here, though. That’s why we will continue without enabling this option. Please turn it off.
And please remember that after turning off the “Safe Updates” option, you must be very careful when updating and deleting data in MySQL. One can always make a simple mistake that could result in the loss of a large amount of data. That’s not what we want to happen, is it?
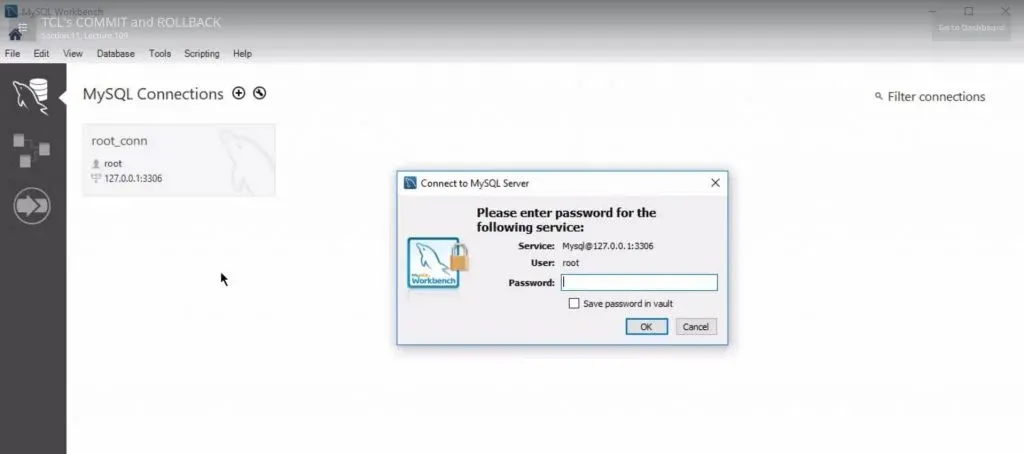
One last thing – to properly switch off the safe updates, reconnection to the database is required. So, let’s exit this connection and then reconnect, typing the password once again!
Now, we are ready to dive into the UPDATE statement.
The UPDATE Statement
All right! Here we go.
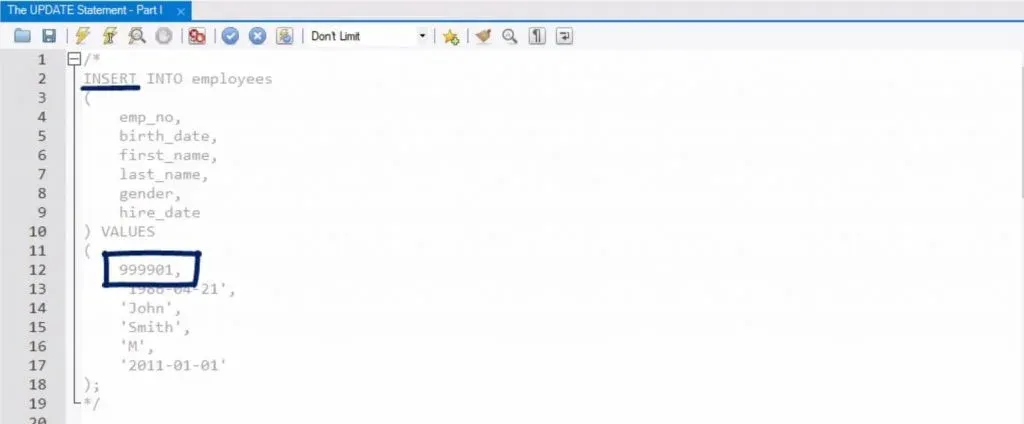
In the previous post about SQL INSERT Statement, we inserted an employee under the number of 9-9-9-9-0-1, remember?
And here we will update this record. The UPDATE statement would allow us to do that. It is used to update the values of existing records in a table.
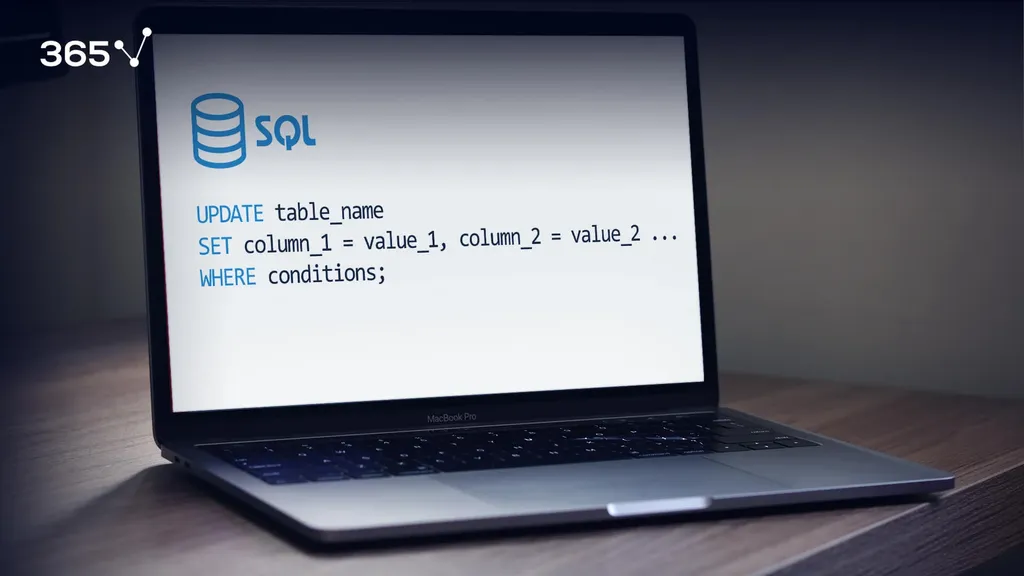
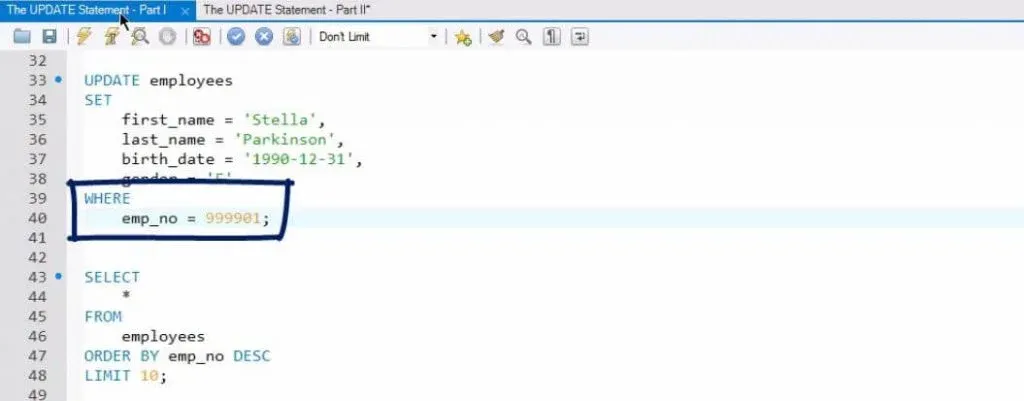
The syntax to adhere to is UPDATE table name, the keyword SET, column names and the respective values assigned to them, and finally – WHERE, and a certain condition, or set of conditions, that must be satisfied.
By using this code structure, SQL will change the record or records satisfying the WHERE condition, updating the old values of the columns listed with the new ones.
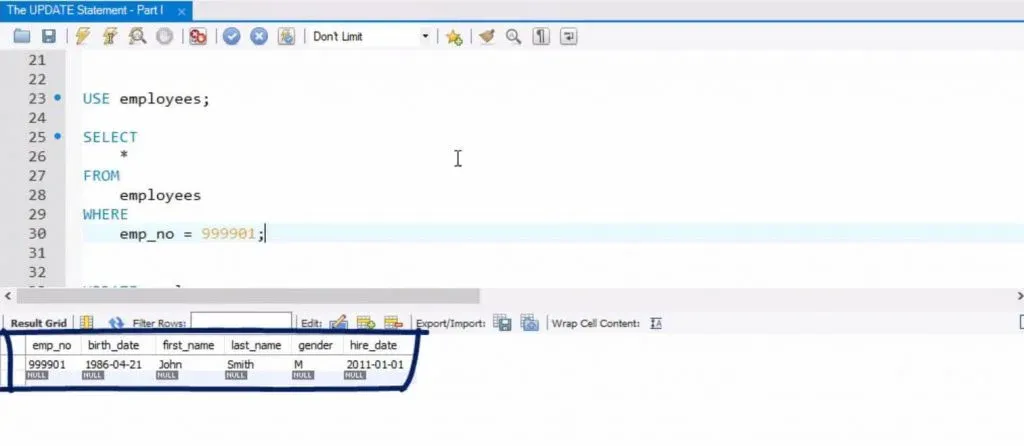
We can see that employee number 999901 is John Smith.
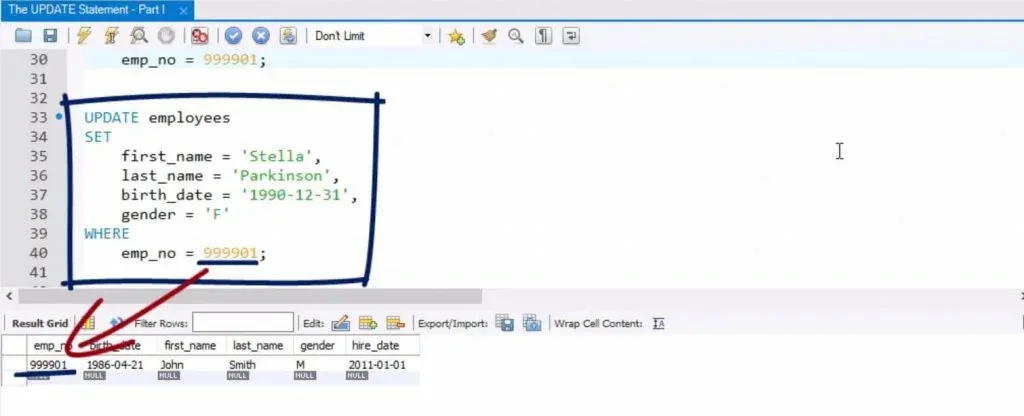
So, we can create a query with the following update statement:
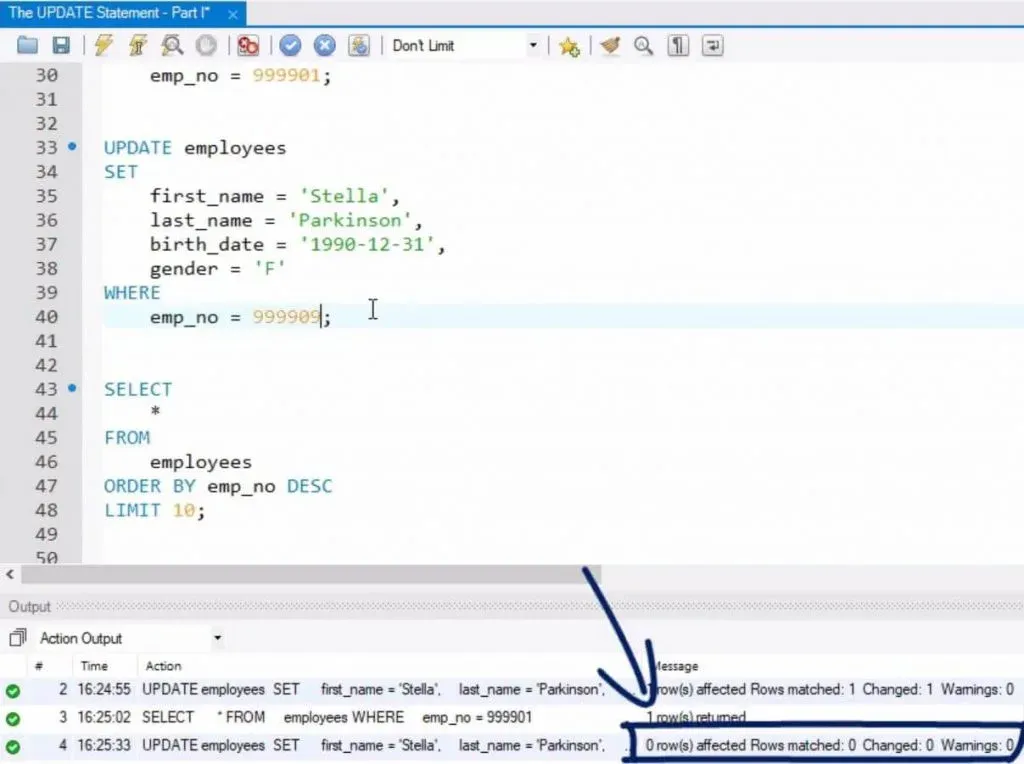
UPDATE “Employees”, SET, and then assign the value of the string “Stella” to the “first name” column, the string “Parkinson” to the “last name” column, the 31st of December 1990 to “birth date”, and “F” to “gender”.
The condition here is to have an employee number that equals John Smith’s number, 999901. This means SQL’s optimizer will, so to speak, access the record with employee number 999901, and substitute the existing values with the new ones indicated in the UPDATE statement.
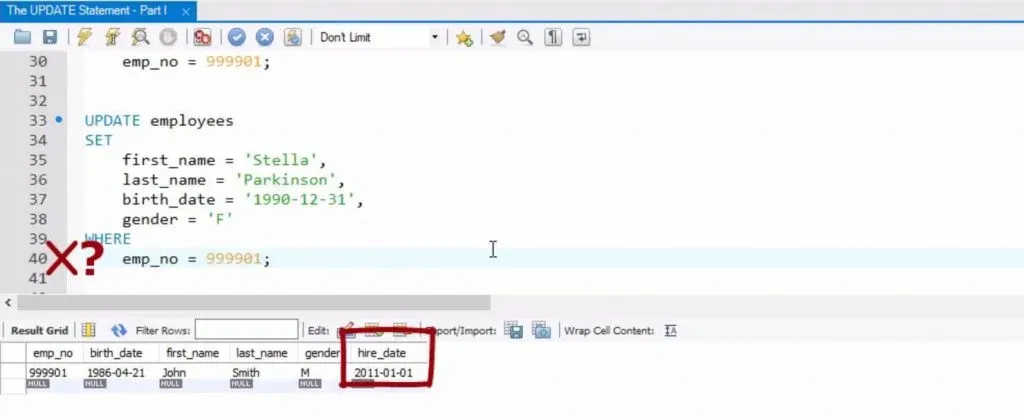
Note that we did not update the “hire date” column value, right? Moreover, SQL showed no error because of that.
This is fine, as we do not have to update each value of the record of interest. Of course, we can still say we have updated the specific record!
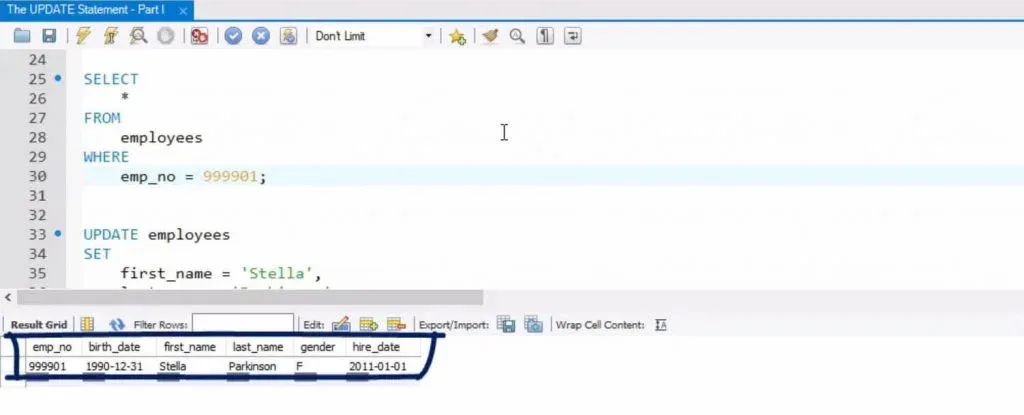
Ok, we can finally run this query. After that, we will select the same employee through the employee number once again. Let’s see what happens.
We see Stella Parkinson there, not John Smith! With a different birthdate and gender, although with the same hire date.
Please note the following feature of the UPDATE statement. Had we used a non-existent condition in the WHERE clause (for instance, an employee number of 999909), MySQL would have allowed the execution of the query, given that the SQL syntax is correct. Nevertheless, nothing would have happened – the statement would have worked, affecting 0 rows, because the data table doesn’t contain an employee with such a number at the moment of the query’s execution.
Stay focused for another interesting feature we will discuss next.
WHERE clause in an UPDATE Statement
When updating your table, the WHERE clause is crucial, although by default in MySQL it is set to be optional. If you don’t provide a WHERE condition, all rows of the table will be updated.
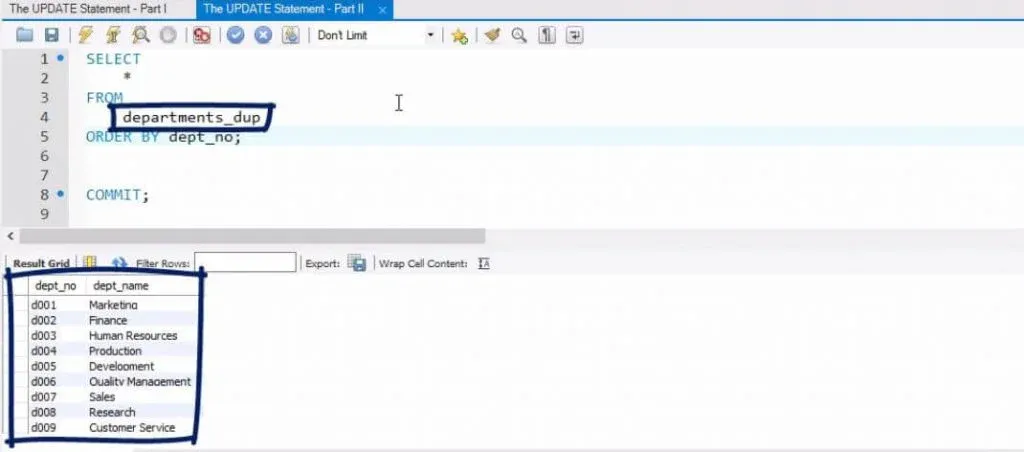
Check what we have in the “Departments duplicate” table – nine rows and two columns with information. Good.
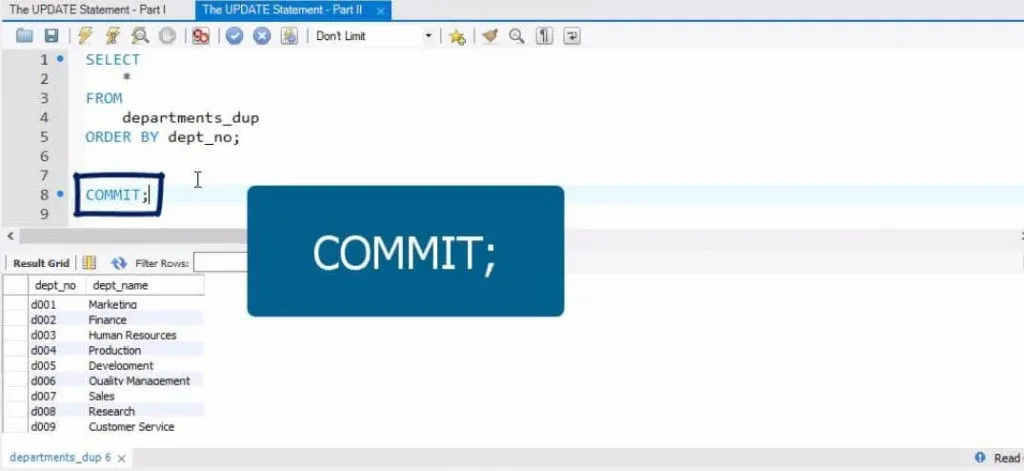
For the sake of this exercise, we will change all the department numbers and names in this table. Right before that, we will execute a COMMIT command. It will “save” the data set as we see it.
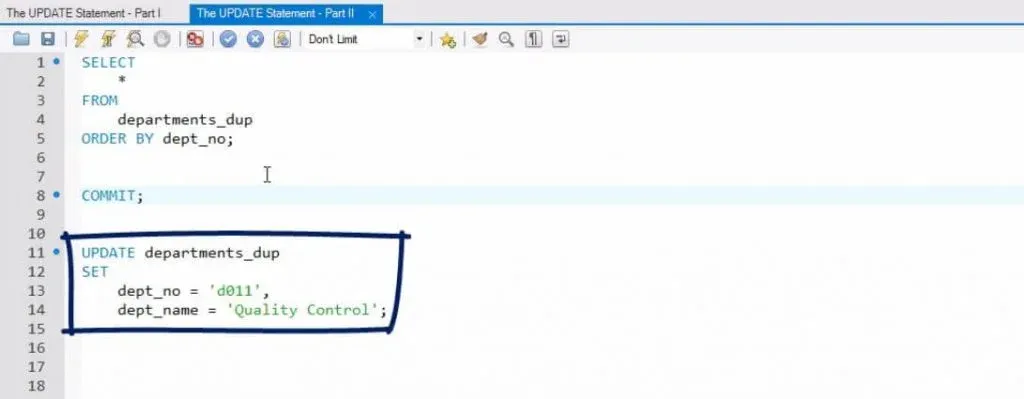
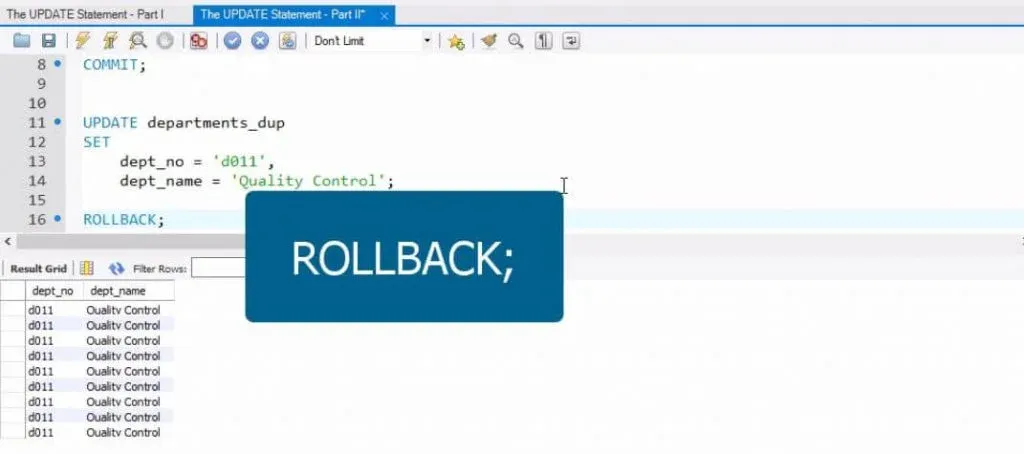
Now, if we write the code that updates the “Department Duplicate” table, setting a department number equal to D-0-1-1 and a department name “Quality Control”, and then run it, we will modify all rows of the data table.
Is this true?
Let’s see…
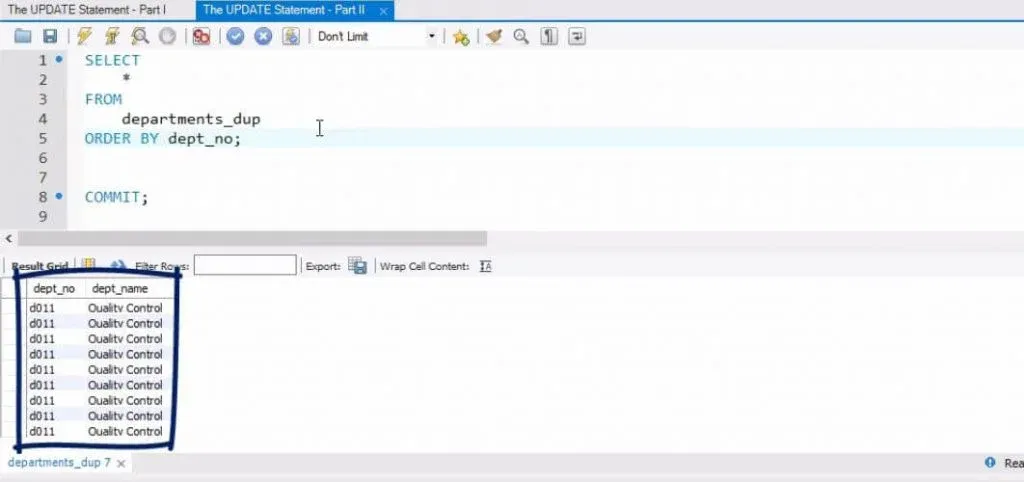
Absolutely! “Departments Duplicate” is a table now comprising identical rows!
This would typically happen by mistake – when the WHERE clause and the accompanying conditions have not been added. If we’ve done this by accident, is there a way to go back?
Of course! We can do that by applying the ROLLBACK command!
When executed, it will take us to the last COMMIT that has been run. Or, if we have not run a COMMIT command beforehand, it will take us to the beginning of the entire SQL code, and we will potentially lose hours of work.
That’s why it was important to COMMIT the changes we made a minute ago.
Remember, you should be careful when using this command because once you execute COMMIT, you cannot reverse any change!
So, after running ROLLBACK, where will we go back to?
Let’s check…
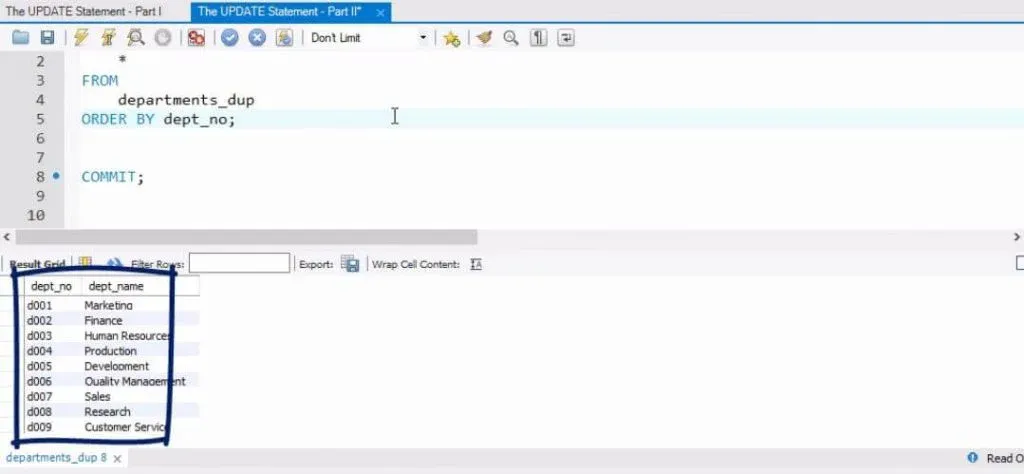
Perfect! We see the information we had in the “Departments Duplicate” table at the beginning of this post.
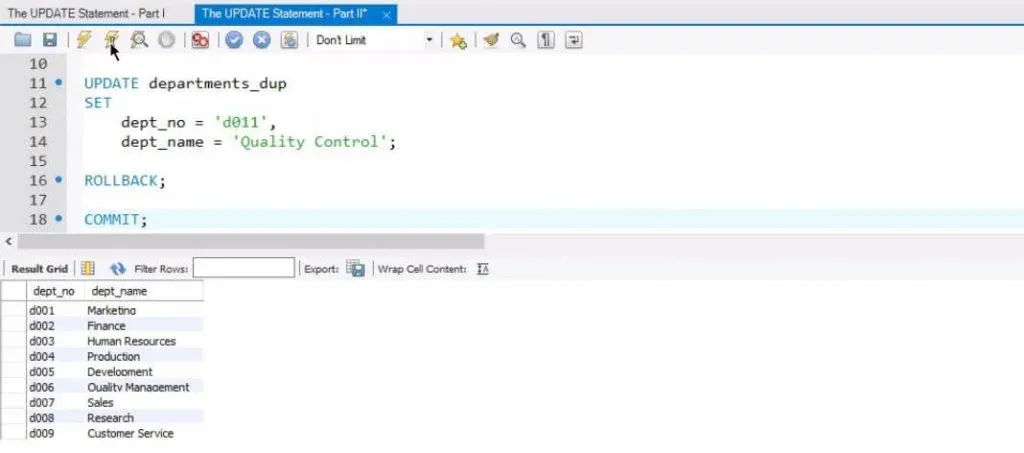
Assume we need the current version of this table for the rest of this tutorial. Thus, it will be very important to execute another COMMIT statement here. Let’s do it.
Fantastic!
What we can infer from the lessons about the UPDATE statement is that you will rarely have to update an entire table. Rather, you’ll have to indicate the exact condition that must be satisfied.
If you don’t, you risk turning your data set into a mess. So, please, be very careful when setting a condition in the WHERE clause of the UPDATE statement. For more on SQL, you can check out Working with Indexes in MySQL, Introduction to SQL Views and How to Write SQL Subqueries. Or jump right to our next tutorial on the SQL DELETE statement.
***
Eager to hone your SQL skills? Check out our SQL course.
Ready to take the first step towards a career in data science?
Check out the complete Data Science Program today. We also offer a free preview version of the Data Science Program. You’ll receive 12 hours of beginner to advanced content for free. It’s a great way to see if the program is right for you.
Next Tutorial: SQL DELETE Statement

